Growing organic apples means working without synthetic fungicides, so every decision you make before the tree goes in the ground matters more than it does for conventional growing. The hard lesson is that disease resistance, rootstock choice, and site preparation are your entire defense, because once scab or fire blight arrives, you cannot spray your way out of it. Start with a Liberty or Enterprise on dwarf M9 rootstock, give it ten feet of space and full morning sun, and you have already solved most of the problems that kill first-time organic orchards.
Disease-Resistant Apple Varieties
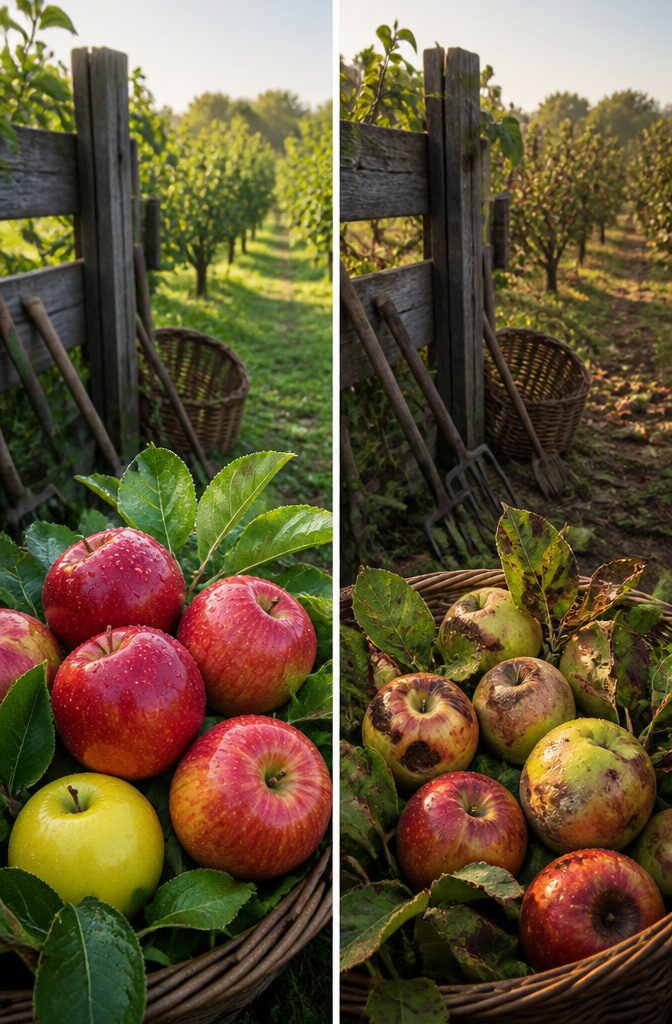
Disease resistance matters more for organic growers because without synthetic fungicides, your only real defense is the genetics of the tree itself. I learned this the hard way watching a McIntosh in my second season turn spotty and drop fruit by July.
Five varieties stand out for home orchards. Liberty gives a crisp, juicy red apple with yellow flesh that works for fresh eating, cooking, or canning. Enterprise has become a favorite of mine for its reliability. Freedom produces large, juicy red fruit for eating fresh, juice, or sauce. Sweet Sixteen carries a faintly nutty flavor in its red-striped skin and excels in pies and sauce. Pristine ripens early with yellow skin and suits both baking and fresh eating.
These varieties resist apple scab, cedar apple rust, and fire blight, the three diseases that otherwise define an organic grower’s summer. Non-resistant cultivars like McIntosh, Cortland, Spartan, and Empire can still produce, but only with an intensive spray program using even organic fungicides, and the work involved is not trivial.
One practical note from the research: do not plant resistant varieties next to unmanaged susceptible trees. The scab fungus can evolve to overcome single-gene resistance, and proximity to infected trees raises that risk.
Choosing Rootstock for Your Space
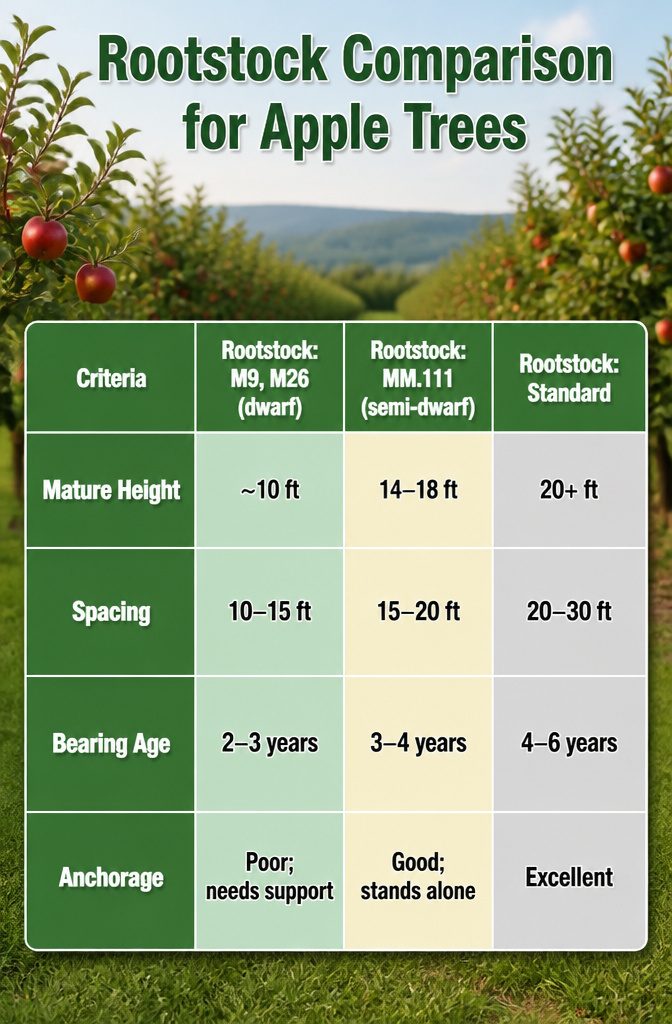
Apple rootstock turns the same cultivar into three completely different trees, so the choice is really a choice about your yard. Dwarf trees on M9 or M26 rootstock top out near 10 feet and need only 10–15 feet of spacing, which is why they fit most patios and small yards. Semi-dwarf MM.111 reaches about 80% of standard height, roughly 14–18 feet in my region, and wants 15–20 feet between trees. Standards run at least 20 feet tall and need 20–30 feet apart, a scale that only makes sense if you are working a true orchard block.
| Rootstock | Mature Height | Spacing | Bearing Age | Anchorage |
|---|---|---|---|---|
| M9, M26 (dwarf) | ~10 ft | 10–15 ft | 2–3 years | Poor; needs support |
| MM.111 (semi-dwarf) | 14–18 ft | 15–20 ft | 3–4 years | Good; stands alone |
| Standard | 20+ ft | 20–30 ft | 4–6 years | Excellent |
The dwarfs bear years earlier, but that speed comes with a catch: their roots do not anchor well, so you will be staking or trellising for the life of the tree. MM.111 roots deep and handles drier soil, which matters more than height if your site is less than perfect. For my money, a beginning grower with one patio corner and a $500 annual budget should start dwarf and accept the stake.
Preparing the Planting Site
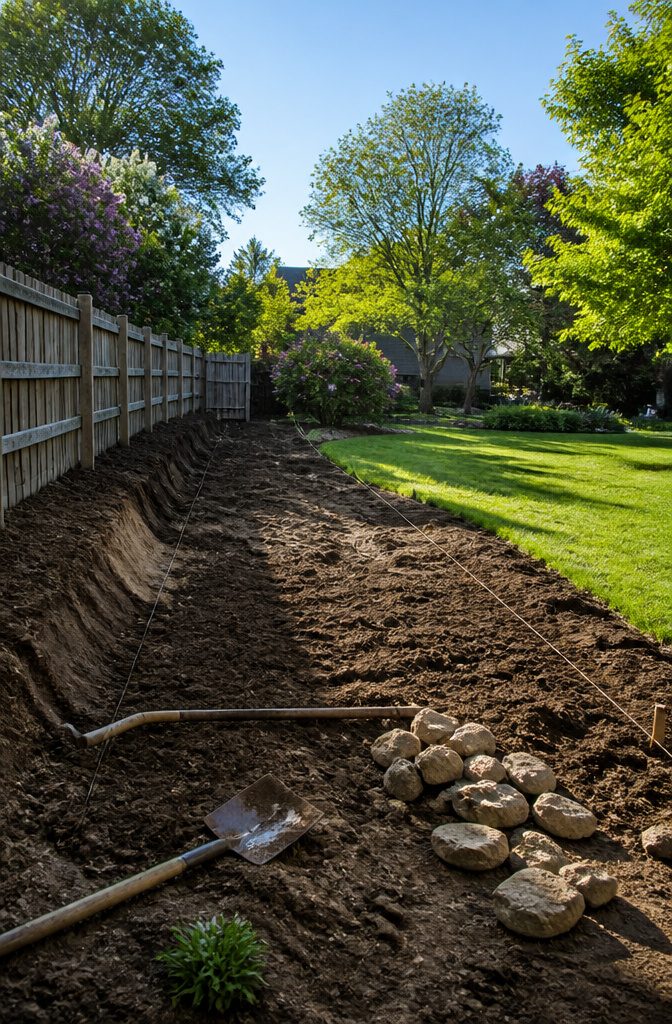
Apple trees need 6 to 8 hours of direct sun each day, and that early morning light from the east matters more than I expected when I started reading up on this. It dries the dew off leaves before fungal spores can settle in, which is half the battle in an organic setup where you are not spraying your way out of trouble.
Good air circulation works the same way. A cramped corner or a windless pocket between buildings traps humidity, and humidity grows the diseases you are trying to avoid by going organic. I have walked enough backyards to see the pattern: the tree jammed against a fence line always looks worse by August.
Soil drainage is the part you cannot fix later with pruning or patience. Standing water after a rain means root rot and a dead tree in three years. Sandy loam to sandy clay loam is the texture range that works, and the pH should sit between 6 and 7. The only way to know where you actually land is a soil test before you dig. I have skipped this step on other projects and paid for it; for a tree that lives decades, the twenty bucks and the wait for results are cheap insurance.
Planting the Tree
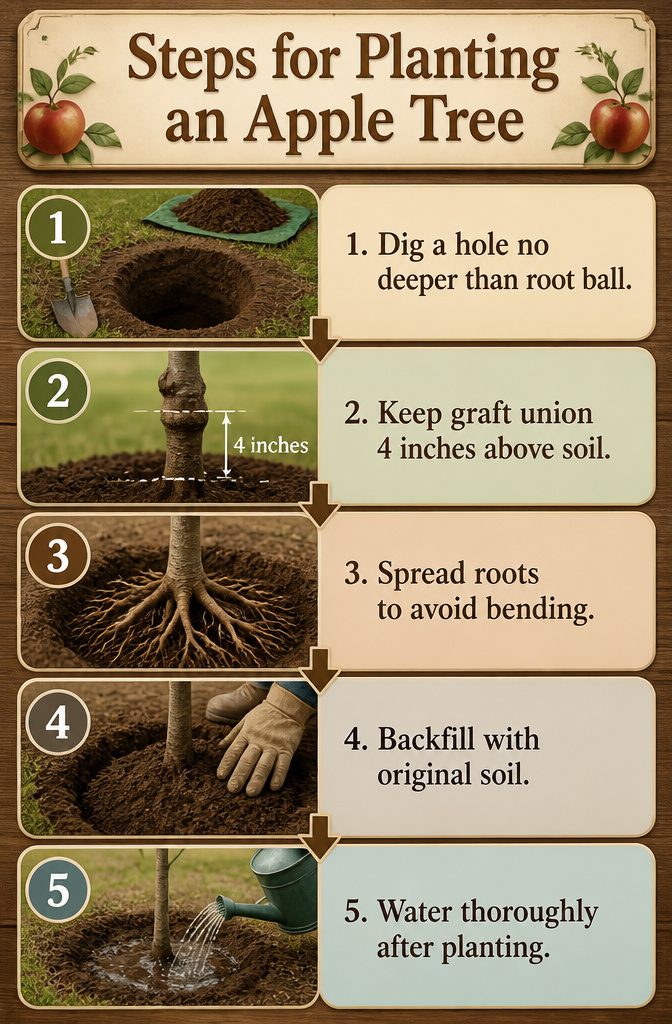
-
Dig a hole no deeper than the root ball and about twice as wide. I pile the soil on a tarp as I dig; it goes back in easier and I don’t lose the good topsoil into the grass.
-
Keep the graft union 4 inches above the soil line. That swollen joint where the scion meets the rootstock needs to stay exposed. Bury it, and the variety will root on its own, turning your dwarf tree into a full-size standard you didn’t plan for.
-
Spread the roots so none bend or wrap around the hole. The color change from bark to root tissue usually marks the old nursery soil line; match that height.
-
Backfill with the original soil, tamping as you go to clear air pockets. No fertilizer in the hole, though up to one-third compost by volume is fine.
-
Water thoroughly after the last soil goes in. The ground settles, sometimes an inch or two; add more soil if it does, then water again.
Watering and Mulching
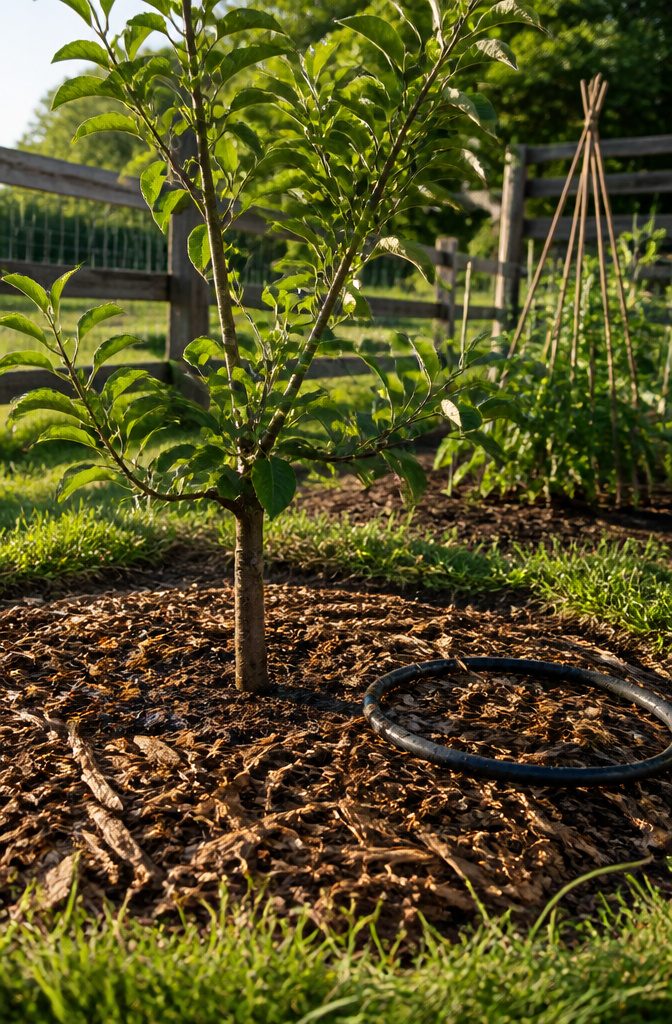
Young apple trees drink more than their roots can find on their own. One inch of water per week from May through October, whether it falls from the sky or comes from a hose, keeps the soil around the root zone from drying into dust. In a real dry spell, that means hand-watering or laying out a soaker hose, not sprinkling the trunk or leaves where standing water invites rot.
Mulch buys you slack on both counts. A ring of aged wood chips or straw pushed out to about four feet from a young tree, or all the way to the drip line once the canopy spreads, holds that moisture in and keeps grass from stealing it. I scratch the surface bare inside the berm every week or two with a hoe, just enough to stop weeds before they seed, then pile the mulch back. A layer of cardboard underneath stretches the weed-free window longer, and the brown matter underneath slowly feeds the fungi that apple roots partner with anyway. The tree does the real work; you’re just keeping the ground hospitable while it gets established.
Annual Pruning
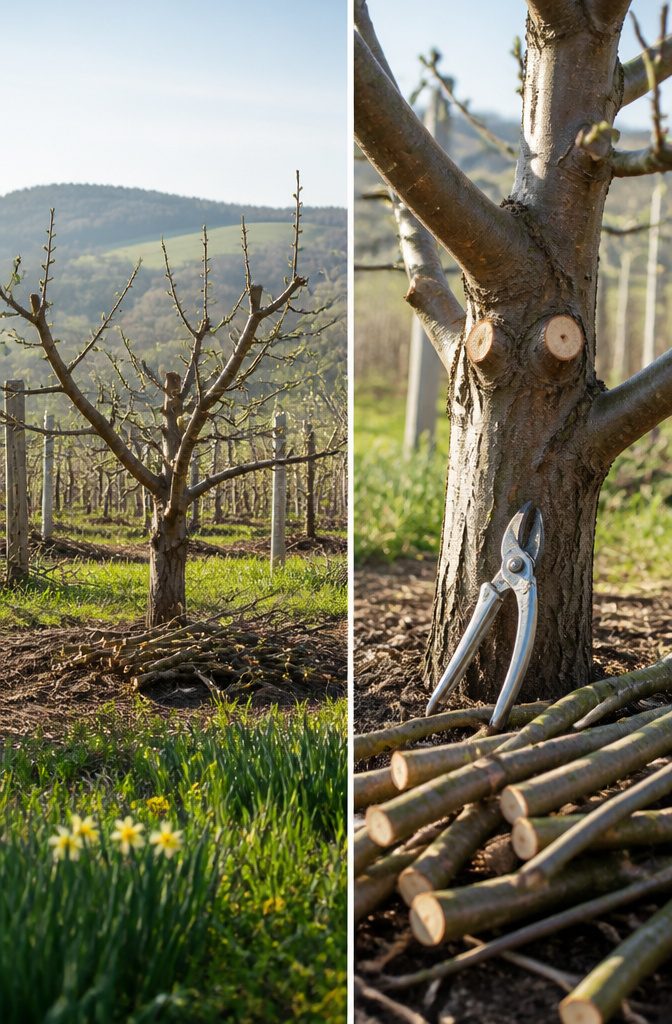
Annual pruning belongs to late winter or early spring, while the tree is still dormant and before buds break. February or March is the window most growers mark on the calendar.
The first goal is opening the canopy so air moves through and sunlight reaches every branch. Dense growth traps moisture, and the dark, damp interior fungal spores prefer is exactly what organic growers are trying to avoid without chemical sprays. A tree with good circulation dries faster after rain and after morning dew, which matters because the east sun that hits the leaves first does much of that drying work naturally.
On a young tree, pruning builds the structure you will harvest from later. I take out crossing branches, anything broken or dead, and spindly growth that would compete for light without bearing real weight. The aim is a sturdy framework of fewer branches, each positioned to carry fruit in seasons ahead.
Mature trees need the same clearing of dead and crossing wood, but height reduction also enters the picture. I cut back the tallest growth and trim branch tips where insects overwinter. The difference is restraint: an older tree that has gone years without pruning cannot be forced back to shape in one season. Recovery takes several years of lighter, steady cuts, and burning the debris each time so eggs and spores leave the property with it.
Thinning Fruit for Better Harvests
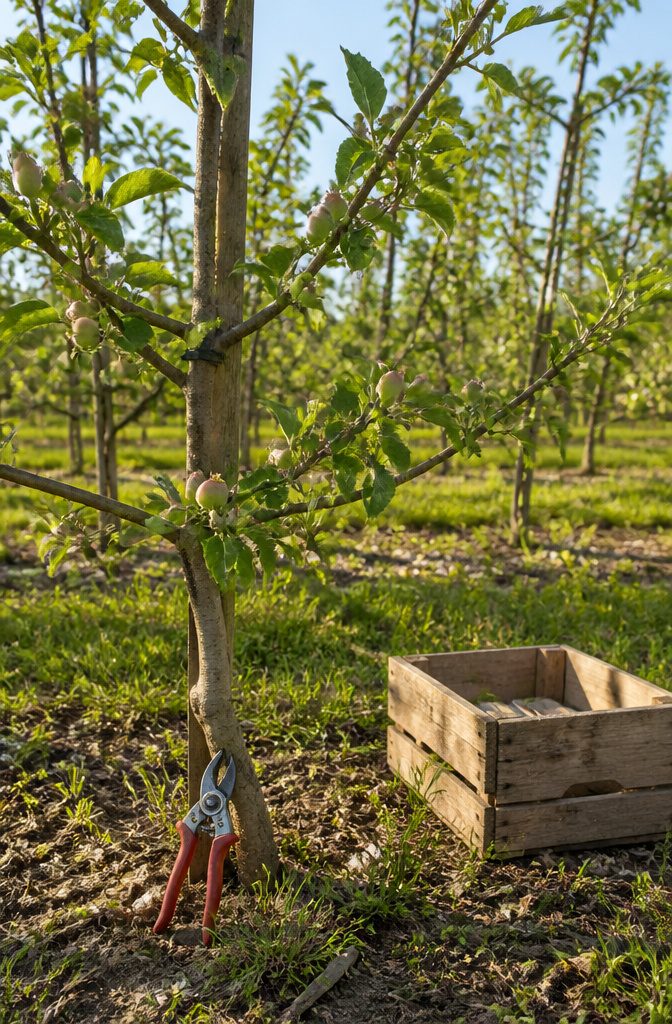
The heaviest mistake I made with my first apple tree was skipping the thinning. That June the branches bent under marble-sized fruit, and I told myself nature would sort it out. It did: two hundred walnutsized apples one year, almost nothing the next.
Thin fruit within five or six weeks after blossoms drop, when the tiny apples are about threequarters to one inch across. Each cluster holds what orchardists call the king blossom, the center flower that opens a day earlier and sets the largest fruit. Leave that one if it is unblemished. Otherwise pick the fruit with the thickest stem. Space them to one per cluster or roughly every 6 inches along the branch.
This timing matters because the developing seeds are already producing gibberellic acid, the hormone that swells this year’s fruit but also suppresses next year’s flower buds. More seeds now means fewer blossoms later. The biennial bearing pattern, heavy followed by nearly barren, is what thinning prevents. The apples you keep grow larger, ripen more evenly, and the tree’s energy carries through to the following spring’s bloom.
Organic Pest and Disease Monitoring
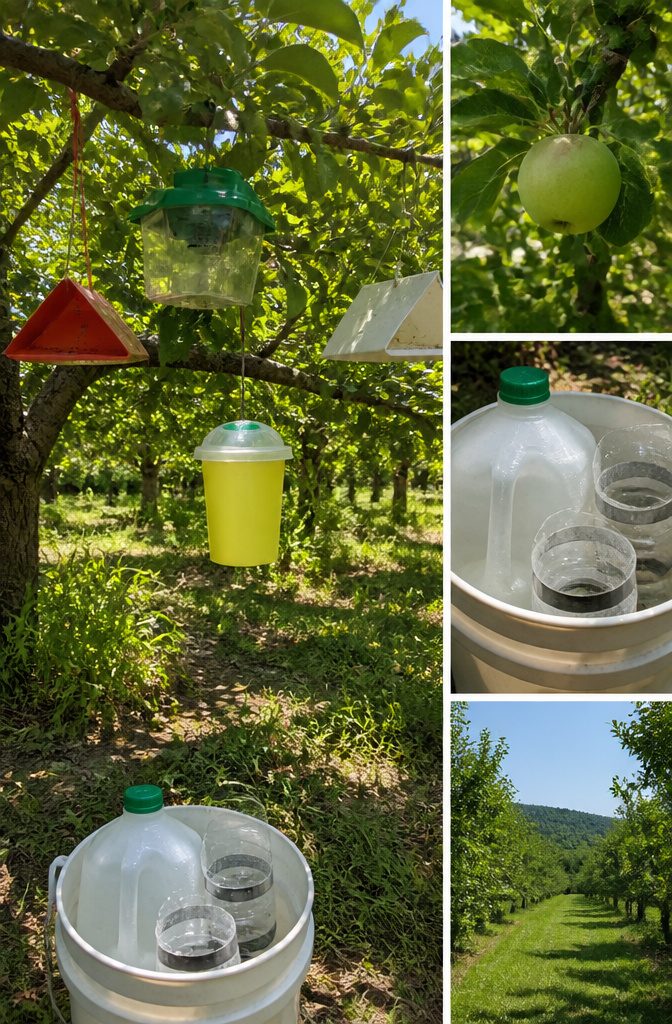
Apple scab, powdery mildew, and fire blight are the diseases that keep organic growers watching their trees closely. On the pest side, codling moth, apple maggot, and plum curculio do the real damage, each with its own timing and weak point.
Codling moth eggs begin hatching 243 degree days after the first moth is trapped, which is why I hang pheromone traps before bloom at eye level, one or two per acre. The sticky bottoms get replaced when they fill up, and the lure itself needs swapping midseason since the pheromone runs out. For a cheaper trap, a gallon of vinegar mixed with a dollop of molasses in a cut soda bottle works from early June through early September; check weekly and dump the drowned moths.
Kaolin clay and neem oil are the organic sprays I reach for, timed to that egg-hatching window when insects are most vulnerable. Netting keeps birds and some insects off entirely, and beneficial insects like lacewings handle the rest if the orchard isn’t too tidy. Weather always wins, though. You plan for the ideal spray moment, then do what the weather allows.
Harvest and Storage
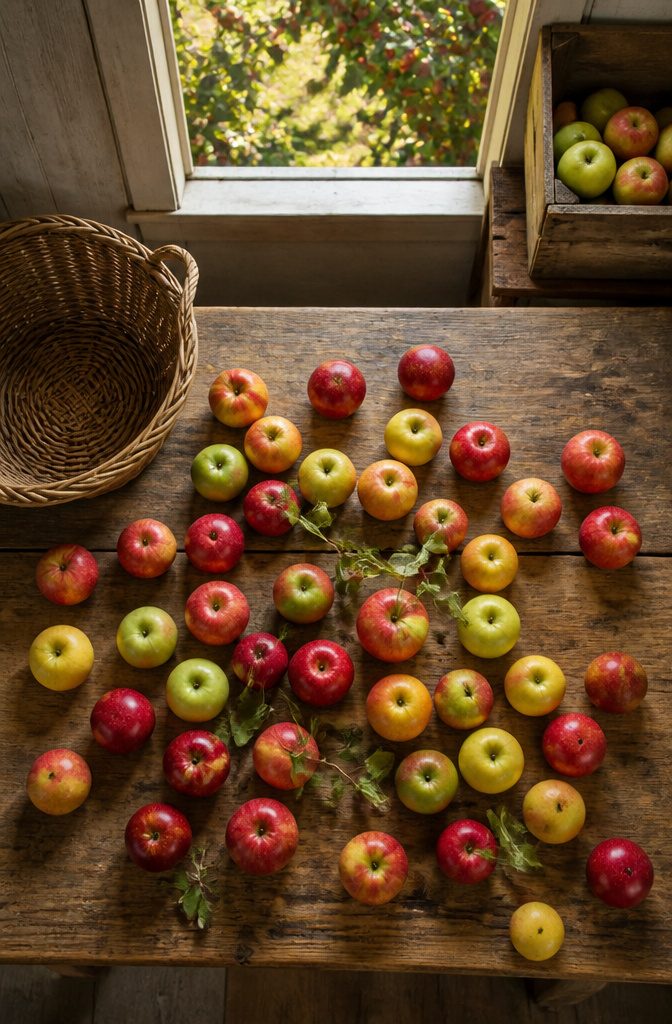
Apples ripen by color and taste, not by calendar date. The ground color shifts from green to yellow, the flesh loses its greenish cast, and the bite you take should be crisp, juicy, and actually worth eating. Last season I picked too early on color alone; the apples looked right but tasted starchy and never improved off the tree.
Store apples at 33°F to 38°F with about 85 percent humidity, and they last up to ten times longer than room-temperature fruit. Most home refrigerators run dry, so a perforated plastic bag or loosely covered container prevents shriveling. A fruit bowl on the counter looks nice for a day or two, then wastes the harvest.
Cool, humid storage carries the tree through to next spring’s pruning. The apples you set aside now are the benchmark for whatever the next season brings.
Soil Fertility with Compost
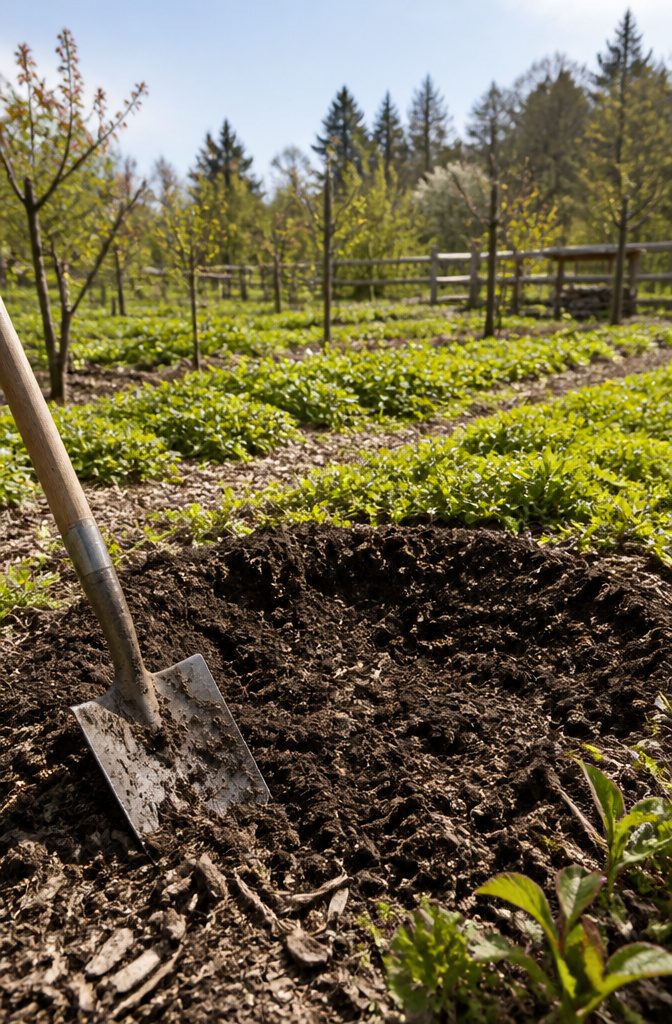
Apple trees pull more from the soil than most backyard crops, and they do it for decades. A soil test before planting tells you the pH, nutrient levels, and what amendments the ground actually needs. I mix in aged compost then, but the work does not stop at the hole. Most of what goes back into the planting hole should be the original soil, with compost added at up to one-third by volume.
After planting, I keep the trees permanently mulched. That layer holds moisture, suppresses weeds, and keeps feeding the soil as it breaks down. For fungus dominance, which apples prefer since they need mycorrhizal fungi around their roots, I add brown organic matter like leaf mold, sawdust, and woody materials. Bacteria-heavy soils favor vegetables; trees want more fungi than bacteria.
Cover crops build fertility between the rows too. Buckwheat followed by fall rye smothers weeds and adds organic matter. Or sow clover with oats as a nurse crop, mowing the oats before they seed to leave protective stubble for the young clover underneath.
The soil-building mindset matters more than any single amendment. Organic apple growing is not about replacing synthetic fertilizer with an organic one. It is about making the soil itself the slow-release source the tree feeds from, year after year, without your intervention every spring.
Deep Watering Technique
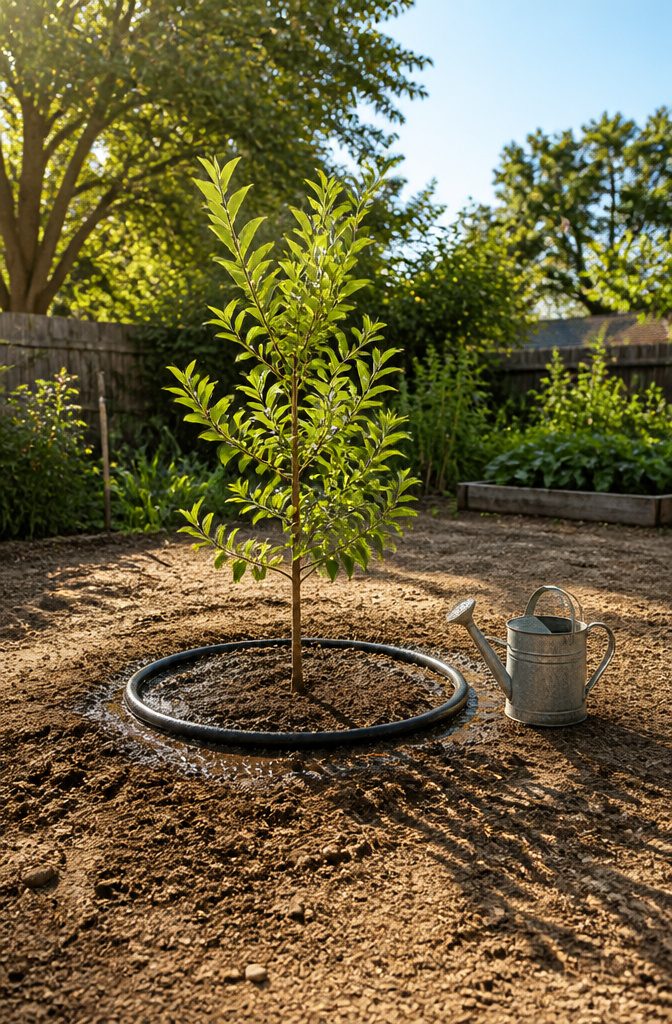
Shallow watering trains apple roots to stay near the surface, where summer heat bakes them dry and winter frost heaves them loose. Young trees especially need the opposite: water delivered slowly enough to sink past that top layer and stay there long enough for roots to follow it down.
In my first season I made this mistake with a soaker hose set on a timer for twenty minutes every morning. The soil looked damp, but a trowel check six inches down showed dust. The tree limped through summer, never establishing the anchor it needed.
Deep watering means giving a young tree about fifteen gallons, then letting the root zone dry completely before the next session. With clay soil, that might mean three buckets twice a week in the first months. Sandy soil drains faster and needs more frequent rounds. Either way, the goal is moisture at depth followed by real dryness, not constant dampness that invites root rot.
Skip sprinklers entirely. Wet trunks and leaves open the door to fungal problems, and broadcast spray never puts enough water where roots actually live. Hand watering or a soaker ring positioned at the drip line keeps the application low and concentrated.
By three or four months in, a tree that has been watered this way starts to need less help. Once-a-week deep soakings replace the frequent rounds, because the roots have grown wide enough to find their own reserves.
When to Call It on a Diseased Tree
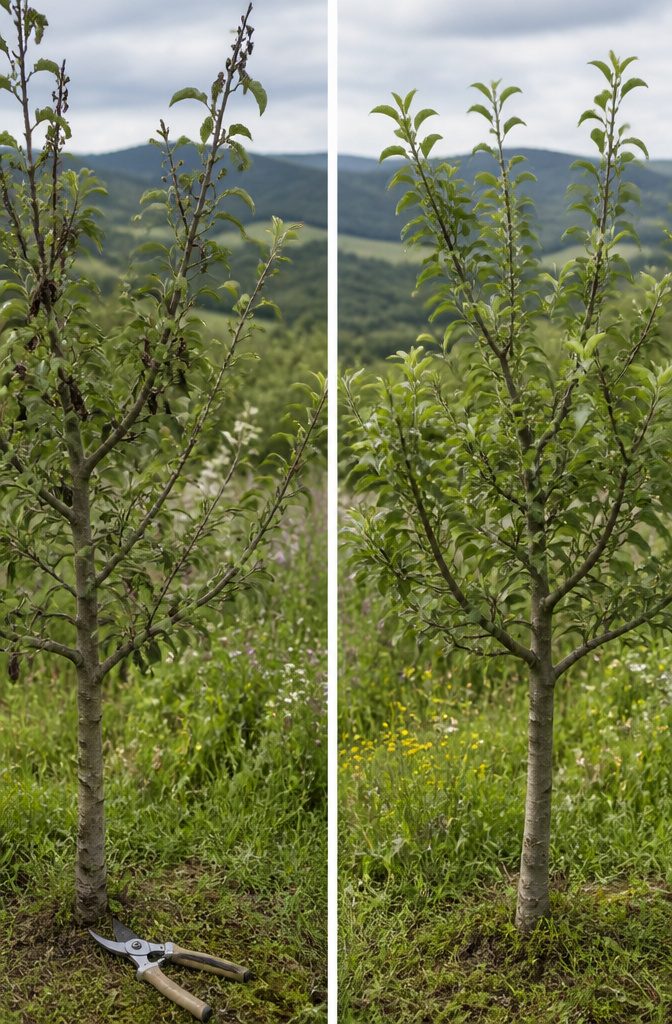
Fire blight moves fast once it finds the cambium layer, and by late summer the blackened shoots can look like someone held a candle to the tree. I have stared at a ‘Liberty’ apple wondering whether the shepherd’s crook bend in that one branch meant the whole thing was done. The line is not a single canker; it is whether the disease has crossed into the trunk or the rootstock union. On a dwarf tree in a patio container, there is nowhere for the infection to hide, and no room to gamble.
Organic sprays, copper or otherwise, work on surface bacteria. They do not reverse wood that has turned chocolate brown inside. I make the cut earlier than I want to, six inches below visible symptoms, with sterilized shears and a stubborn hope. If the inner wood at the cut is clean and pale, I watch that stump for two weeks. Any orange ooze, and the tree comes out.
Small-space growers do not have the luxury of a quarantine corner. A diseased tree sitting ten feet from your replacement means you are running a nursery for the pathogen. My rule now: if I cannot trace the damage to a single removable limb by early July, I dig and burn in the same afternoon. The soil is not poisoned; fire blight does not persist there. The new tree goes in the same hole next spring, and I choose a different variety with known resistance.
Rootstock Spacing Reference
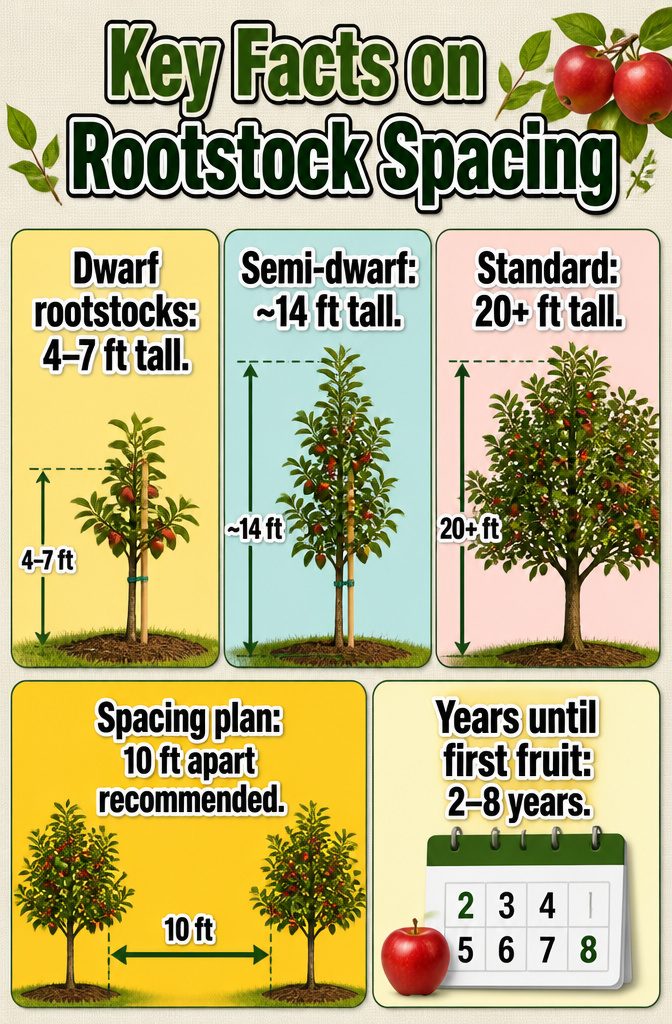
Dwarf rootstocks like M27 and P16 keep trees at 4–7 feet, but that compact size comes with a catch: the roots stay shallow and brittle, so staking and regular irrigation are non-negotiable. Semi-dwarf options such as M106 top out around 14 feet, while standard rootstocks push past 20 feet and need years longer before they fruit. The sooner you want apples, the smaller the tree you should pick.
Plan your spacing before the trees arrive, because rootstock choice locks in your layout for the next decade or more.
| Rootstock Type | Mature Height | Recommended Spacing | Years to First Fruit | Support Needed |
|---|---|---|---|---|
| Dwarf (M27, P16, M9) | 4–12 ft | 8–10 ft apart | 2–3 years | Staking required |
| Semi-dwarf (M106) | ~14 ft | 12–16 ft apart | 3–5 years | Optional support |
| Standard | 20+ ft | 18–25 ft apart | 5–8 years | None |
I keep a copy of this taped inside my garden shed door. When I’m standing in the nursery in February trying to remember whether I have room for one more tree, the numbers are right there, and I’m not guessing my way into an overcrowded row five years later.
What I Learned from My First Apple Tree
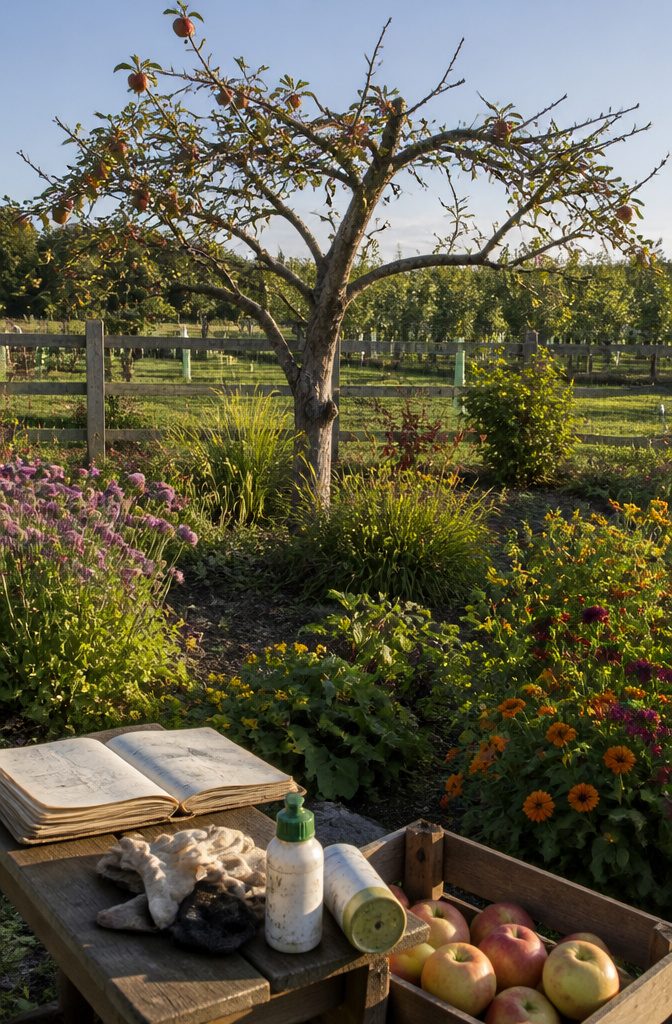
I bought a Honeycrisp apple tree from a garden center in 2019, planted it in a sunny corner of my small yard, and waited for the harvest. That was the whole plan, and it failed at every step. The variety turned out to be a poor match for my zone, the tree struggled with pests I could not identify until the leaves were already stippled and curling, and the few apples that set dropped before August from a disease I had never heard of. The lesson was that choosing a familiar name and planting it is not a plan; it is the hard way disguised as the easy way.
The squirrels came later, after I had finally managed to protect a small crop with nylon footies. One figured out how to strip the covers and tear them open, and I lost nearly full-grown fruit to a single animal I had not accounted for in any budget or calendar. Earwigs crawled through the stem openings in the plastic baggies I switched to, though the nylon had stopped them. Each solution carried its own failure mode.
What I do differently now starts before purchase, not after disappointment. I check rootstock hardiness, disease resistance ratings, and whether the variety even ripens in my frost window. I budget for trunk barriers and timed protection, not just the tree. The first apple tree taught me that organic growing is not about refusing sprays; it is about building enough knowledge that sprays become unnecessary because the problems never arrive.
Frequently Asked Questions
What are the best apple varieties for organic growing?
Disease-resistant varieties like Liberty, Enterprise, Freedom, Sweet Sixteen, and Pristine are the best choices for organic growing. These resist apple scab, cedar apple rust, and fire blight, the three diseases that otherwise define an organic grower’s summer. Non-resistant cultivars like McIntosh, Cortland, Spartan, and Empire can still produce, but only with intensive organic fungicide sprays.
How do I prevent pests in my apple orchard?
Use physical barriers like netting and row covers, biological controls such as beneficial insects including lacewings, and organic sprays like kaolin clay and neem oil timed to vulnerable windows. Hang pheromone traps before bloom to monitor codling moth, and check homemade vinegar traps weekly through the season. Good air circulation and morning sun that dries dew off leaves also help prevent problems before they start.
When should I prune my apple trees?
Prune in late winter or early spring while the tree is still dormant and before buds break, typically February or March. This timing opens the canopy so air moves through and sunlight reaches every branch, which helps dry leaves before fungal spores can settle in. Remove crossing branches, dead wood, and spindly growth, and burn the debris so eggs and spores leave the property.