The cheapest raised bed costs nothing beyond the soil you already need, while the most durable will outlast two decades of weather.
What separates the two is not price alone but how long you intend to stay in one place and whether you need to bend to reach your plants.
A mounded eight-inch heap of amended soil works the first season for free, though by August rain has flattened its neat oval into something closer to a lumpy pancake.
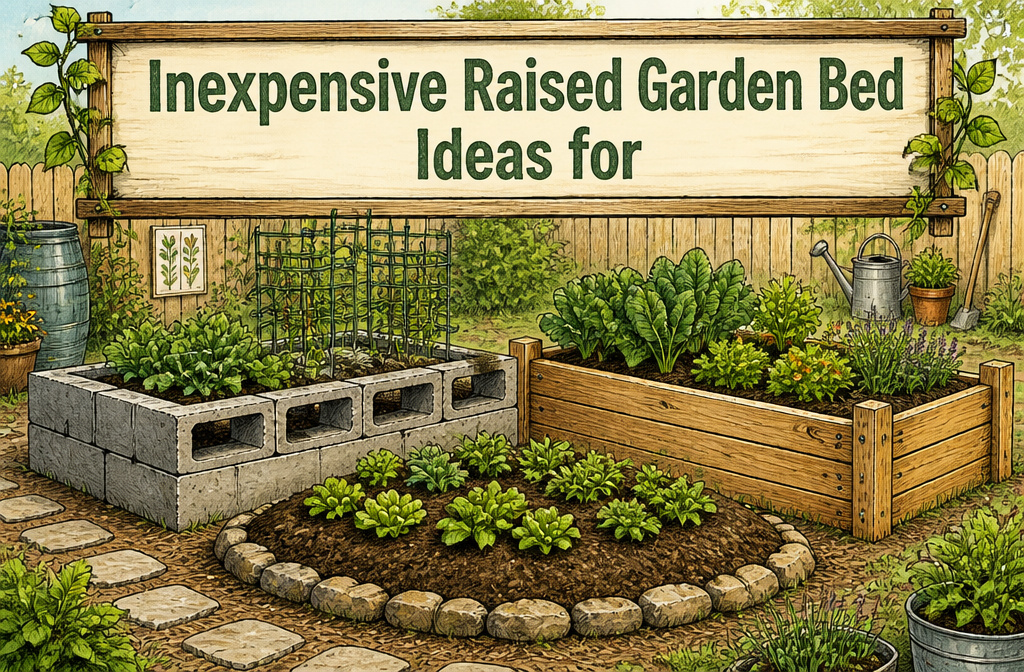
Cinder blocks run $2 to $3 each and stack dry in an afternoon, but only if you spend the hour leveling first; one corner high throws the whole frame off.
1. Mounded Soil Beds
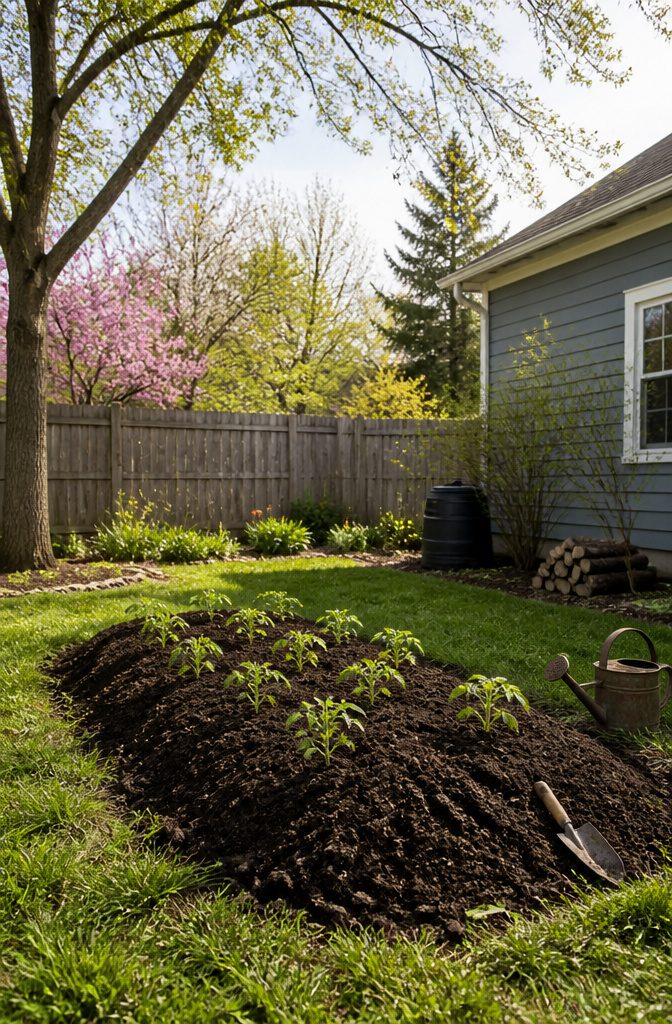
The cheapest raised bed is no bed at all, just soil mounded up with no frame to buy or build.
Last spring I watched my neighbor’s mounded tomatoes outperform my own wooden boxes, and the only cost was the compost and peat she worked in.
An eight-inch mound is the minimum for poor native soil; four to eight inches will do if your ground is already decent. The tradeoff is real.
Rain washes the sides, and by August the neat oval she started with had flattened to something more like a lumpy pancake. Plants do not mind, but the gardener might.
Shape loss gets worse on any slope, and walking between mounds can compact the edges where roots need to breathe. Still, for a first season or a tight budget, mounded soil beats waiting until you can afford lumber.
Amend the ground, heap it up, plant. The frame can come later when the soil is already working.
2. Cinder Block Beds
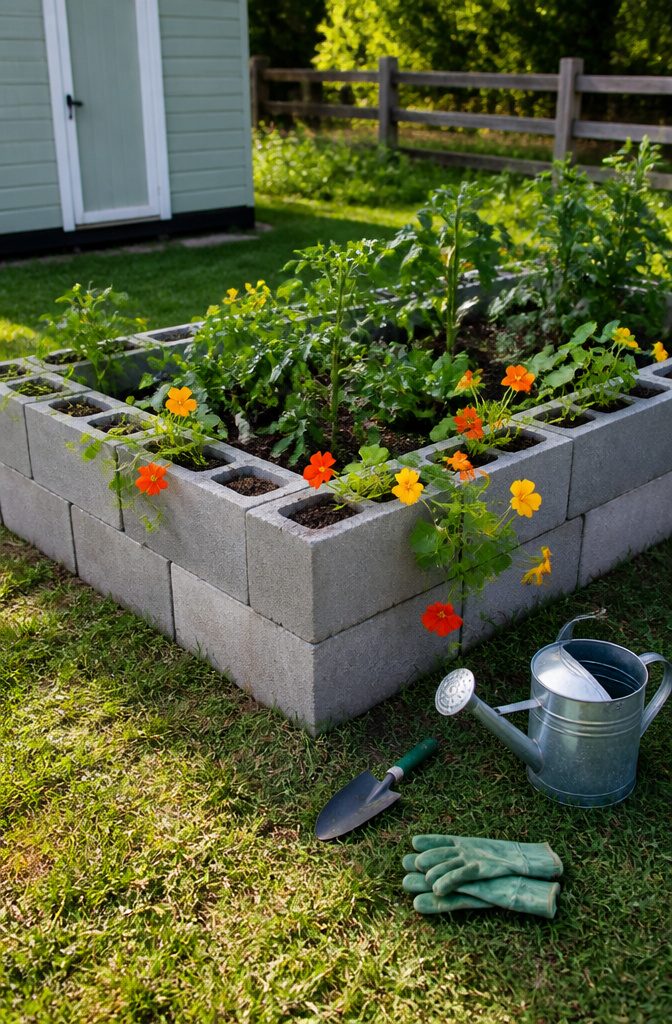
Concrete blocks run about $2 to $3 each at the home improvement store, which makes a small bed cheap enough to build in an afternoon.
The real work is leveling: one corner sitting high throws the whole stack off, so you rake and tamp until a four-foot level reads true on every side.
Stack them dry, two high if you want the extra height, and the weight holds itself in place without mortar.
The holes in the blocks are worth using.
Fill them with soil and plant marigolds, nasturtiums, or borage there; the flowers trail over the edge and some are edible. The blocks themselves do not rot, so the bed lasts as long as you care to keep it.
The fly ash question comes up often.
Modern concrete blocks sold in the U.S. are held to ASTM standards for leaching, and the consensus I found, reading through a dozen of these builds, is that the risk is low enough that most gardeners do not worry.
If you are concerned, line the inside with heavy landscape fabric; the soil never touches the block.
3. Planter Wall Block Beds
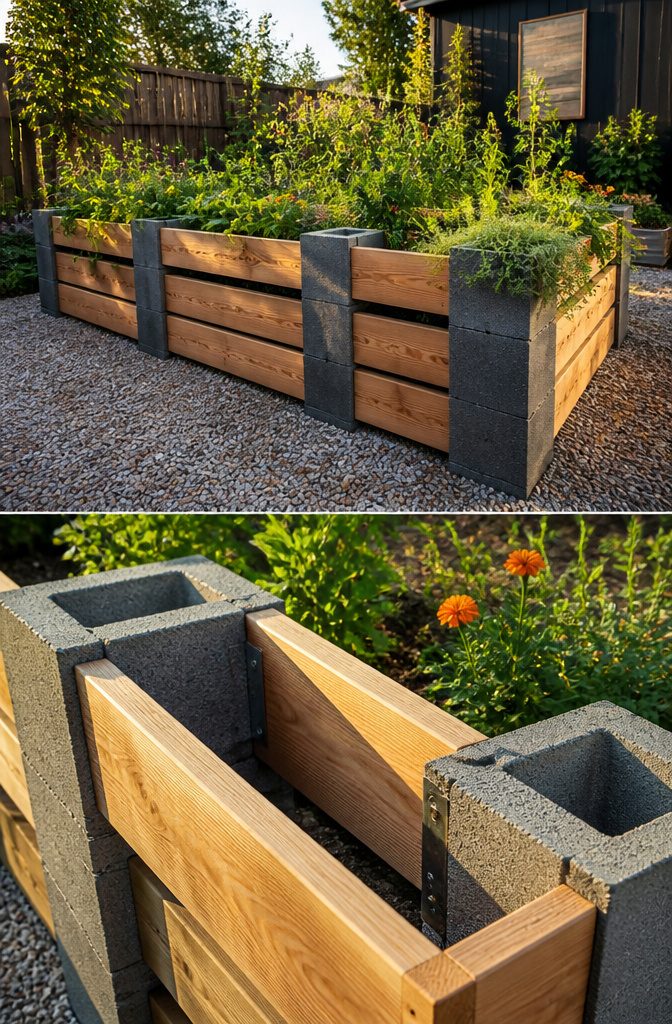
Planter wall blocks turn raised bed building into something closer to assembly than carpentry. Each block has two open notches; set four in your corners, slide 2×6 boards into the slots, and you have a frame.
The boards can be cut to whatever length your space allows, so you are not locked into a standard kit size, and expanding later only means buying another pair of blocks and two more boards.
The system costs more than raw cinder block, but the edges come out cleaner and the corners sit square without fuss.
One builder put together an 8-block, 4-board bed for under $75, rebar driven through the block holes to lock everything in place.
Pine keeps the price down though it will need replacing sooner than cedar; figure three to five years unless you seal it.
A second tier stacks the same way, blocks on top of blocks, boards sliding in between. No saw needed if your hardware store cuts lumber to length, which most will do free.
4. Rocks and Stone Beds
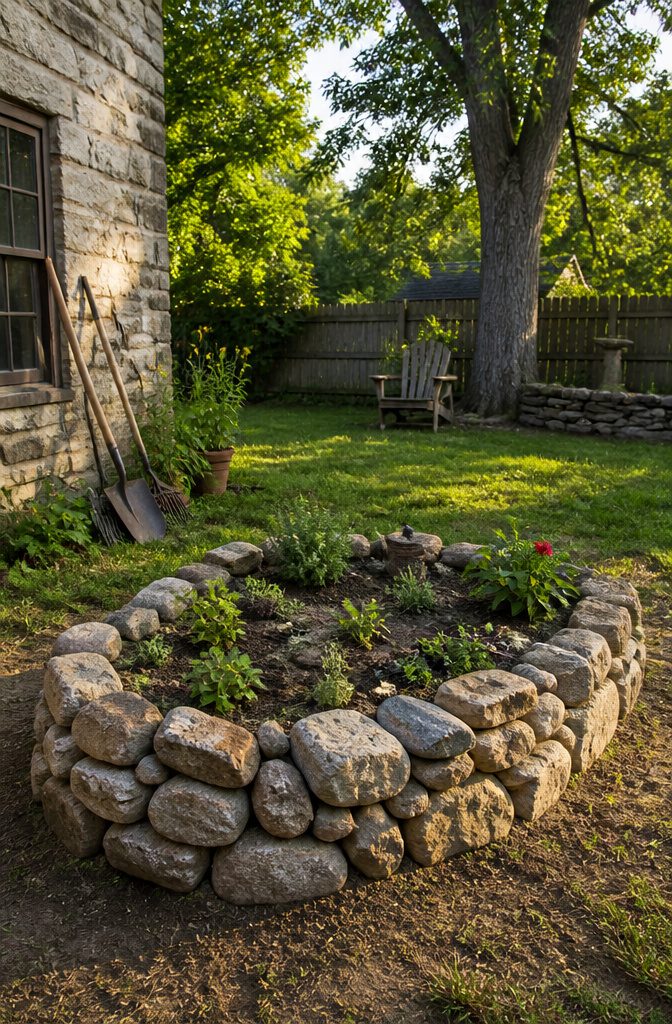
Fieldstone, river rock, or broken concrete can frame a bed for nothing more than the labor of fitting them.
The stones I gathered from a friend’s creek bed cost me a Saturday and a case of beer; the ones left stacked in our yard by the previous owner cost nothing at all.
Both beds are still solid after six years.
The work is slow. Each stone is a different weight and face, so you spend more time turning and testing than stacking.
A sloped yard is where this method earns back the hours, because the stones become a small retaining wall as they rise, holding soil on the uphill side without extra bracing.
My flattest stone bed took three hours to build; the terraced one on our backyard slope took parts of three weekends.
Free or nearly free material sourced locally is the main draw, but permanence cuts both ways.
You will not move this bed next season to chase better sun. The stones settle where you put them, and the soil behind them packs in tight.
Plant your shade lovers on the north side of a tall stack, your heat-seekers where the stone radiates afternoon warmth, because that wall is not shifting to suit a new plan.
5. Pallet Beds
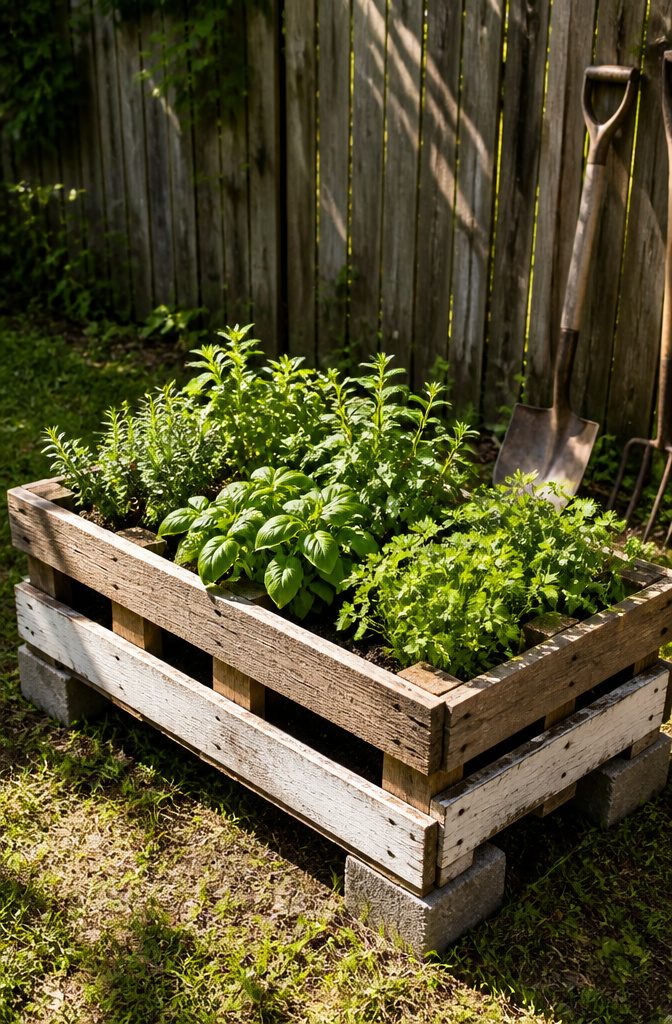
Pallets are the first thing most people picture when they think of a cheap raised bed, and for good reason.
The wood is free if you know where to look, and the slats are already spaced for drainage. The catch is the stamp.
Look for HT, which means heat-treated, and walk away from anything marked MB for methyl bromide. That chemical treatment leaches into soil and stays there.
You have two ways to build with them. Disassembling the pallets gives you loose boards to frame a traditional box, usually 3 to 4 inches deep per board.
Leaving them whole means working with the existing gaps between slats, which run about 1.5 to 2 inches apart. Those gaps suit shallow-rooted crops: lettuce, arugula, basil, cilantro, and other herbs or greens that do not need a foot of soil.
Stand a whole pallet vertically against a wall or fence, staple landscape fabric across the back and bottom to hold soil, and you have a narrow planter that takes up almost no ground space.
Untreated pallet wood in ground contact rots fast. Expect two to three years before the bottom boards soften and the frame starts to sag.
Painting the exterior with a dark color like black or iron ore slows moisture uptake slightly and makes green foliage read sharper against it, but it does not stop the decay.
Plan on rebuilding or replacing the bottom course by year three.
6. Bathtub and Appliance Beds
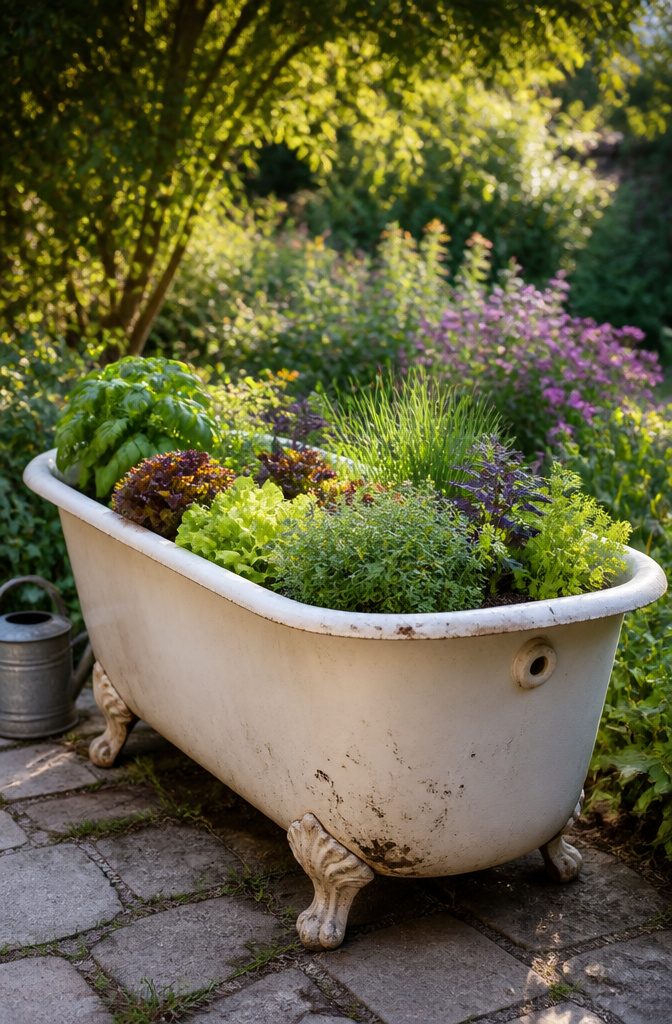
A cast iron or steel bathtub from a ReStore or junkyard is nearly indestructible, and once you set it down, it stays put.
The weight is the main thing: you will need help moving it, and you should choose the spot before you commit, because shifting it later is not practical.
The enamel finish gives it a deliberate, almost sculptural look rather than something dragged from the curb.
Drainage is the first task. The tub was built to hold water, so drill holes in the bottom before you add anything; a couple on the sides will not move water fast enough for the volume of soil.
Line the base with gravel, then sticks and cardboard, and finish with rich soil on top.
Washing machine drums work on the same logic.
The perforated steel already drains, though you may want to enlarge a few holes. They sit lower than a tub, so they suit shallow-rooted crops like salad greens or herbs.
Old sinks fall somewhere between the two.
Porcelain over cast iron has the same finished look as a tub, but the smaller size limits you to single plants or compact herbs. Wall-mounted styles need bracing if you want them freestanding.
All three read as quirky in a way that reads intentional, not patched-together. The enamel and the steel age slowly, and the shapes are familiar enough that they do not need explaining.
7. Old Furniture Beds
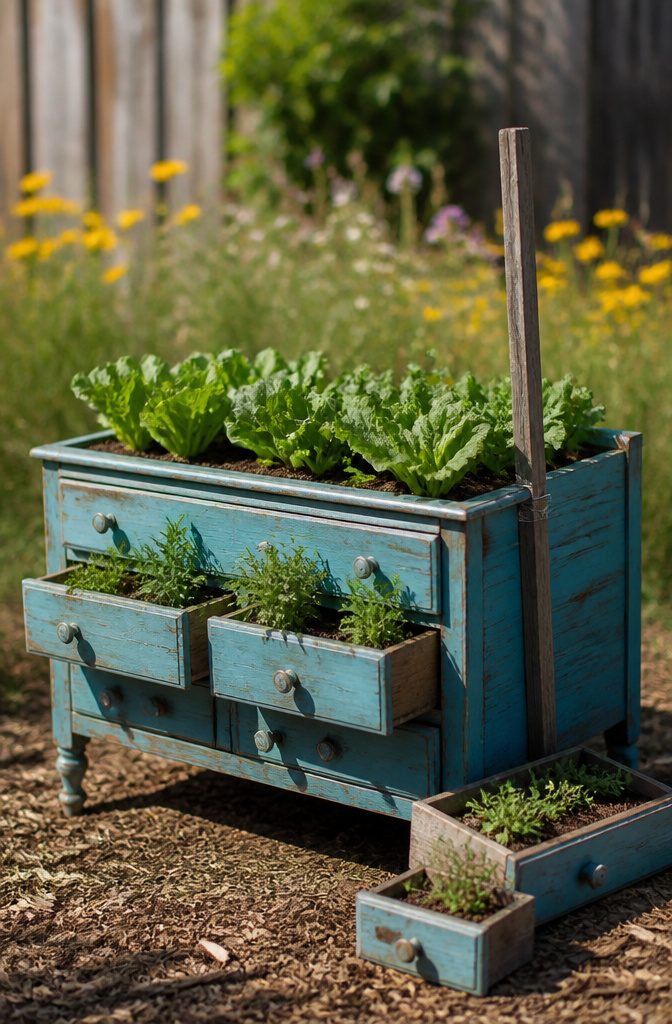
A dresser with the drawers pulled out and a few holes drilled through the bottom makes a raised bed that looks like garden design, not a pile of trash waiting for pickup.
I have seen cabinets and old toy boxes used the same way; the trick is choosing pieces that already read as boxes rather than furniture with legs and hardware still attached.
Particleboard soaks water like a sponge, so expect one, maybe two seasons before the sides bow and crumble. Solid wood lasts longer but still rots faster than lumber bought for outdoor use.
Shallow-rooted plants are the only fit here: leafy greens, herbs, strawberries, maybe a pepper if the soil depth hits eight inches. Deep-rooted tomatoes will hit the bottom and sulk.
The upcycling story matters as much as the function. A bright coat of exterior paint and the drawers stacked nearby as planters turn the project into something you would photograph rather than hide behind the garage.
8. Elevated Wood Planter Boxes
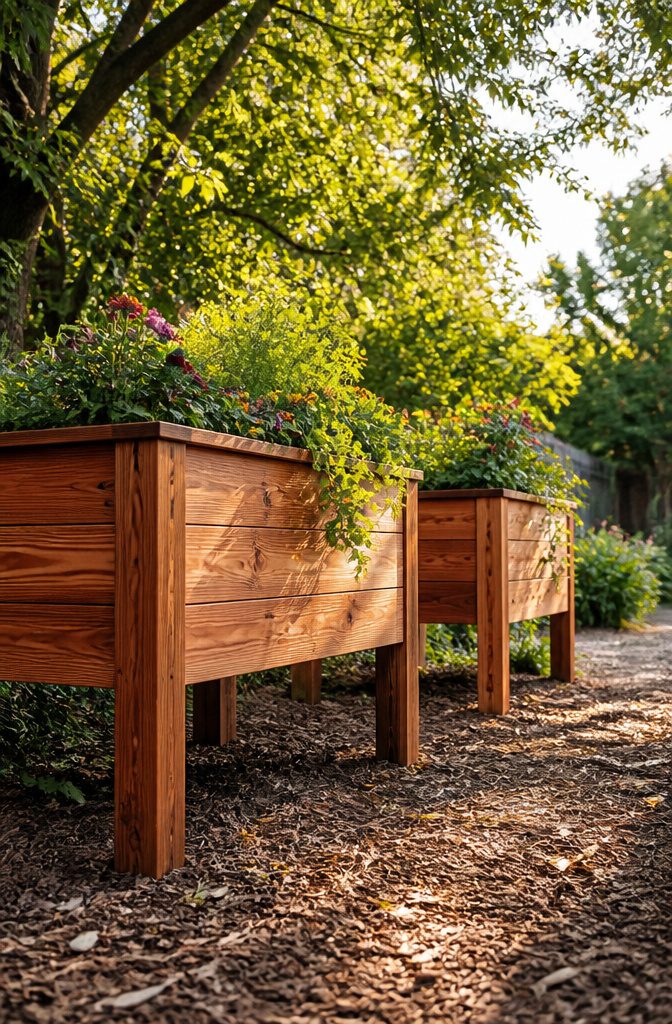
Elevated wood planter boxes cost more up front than beds sitting right on the ground, but they earn that price back fast for anyone who cannot bend or kneel comfortably.
The frame sits at waist height or higher, so the soil comes to you.
Cedar and redwood resist rot naturally and last about ten years. Untreated pine is cheaper and works fine for a shorter run, maybe a few seasons, before it starts to soften.
Pressure-treated lumber saves money too, though the chemicals used in treating it can leach into soil you plan to eat from.
For the box itself, keep the width to four feet or less if you want to reach the center without climbing into the bed. That rule holds whether the bed is on legs or built as a solid pedestal.
Either way, the structure needs a bottom or legs that lift it clear of the ground, plus enough cross-support that wet soil does not bow the frame over time.
A 48-inch cedar planter box runs under $100 ready-made, which sets the floor for what building your own might save.
9. Galvanized Planter Beds
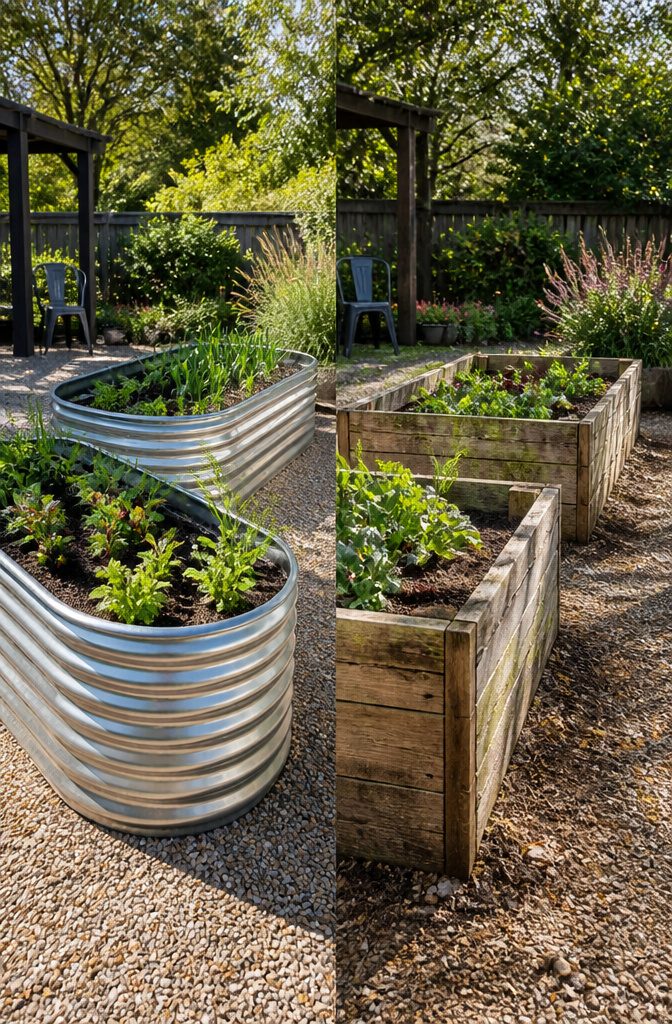
Stock tanks and custom-built galvanized steel containers carry an industrial look that reads modern against grass or gravel.
The zinc coating keeps them from rusting, so a galvanized bed lasts 20 years or more with almost no upkeep, outliving most wood by a decade or two and closing the cost gap over time even if the upfront price runs higher.
Soil in metal warms faster in spring than in wood or ground-level beds, which matters in short growing seasons.
The trade-off is drainage: if the container has a solid bottom, drill holes before filling it. Some gardeners add a layer of rock at the base, then manure, then soil on top.
The oval tubs and rectangular stock tanks come in enough sizes that you can line a driveway with matching planters or tuck a single small one on a balcony.
10. Tiered Vertical Beds
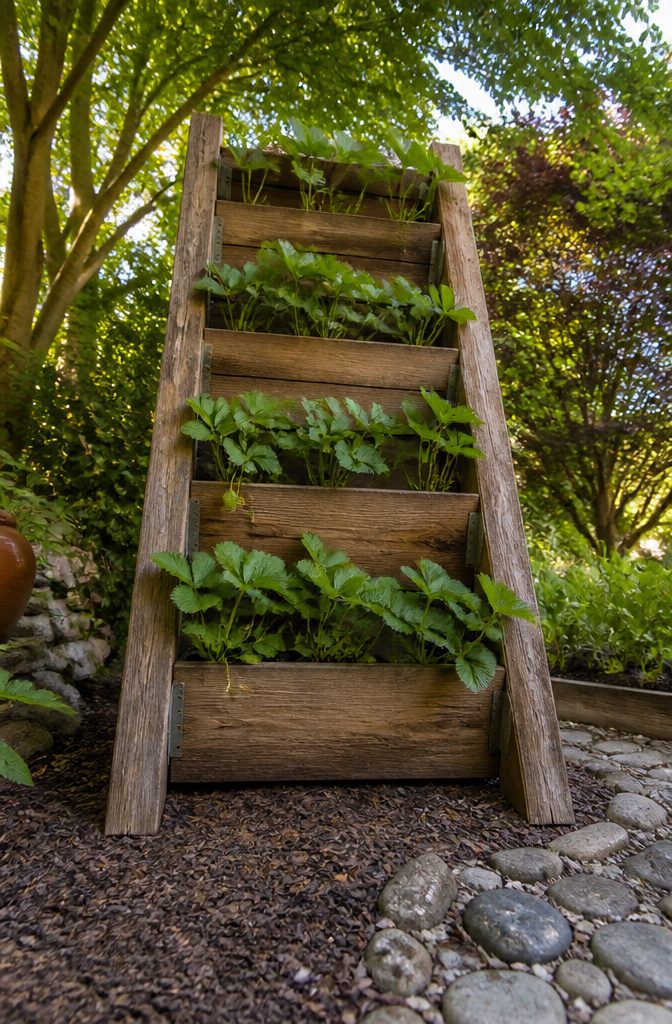
Stacking beds upward turns the same footprint into multiple planting levels. A strawberry pyramid, a ladder-style planter, or cascading boxes each give you two to four times the square footage without claiming more patio stone.
The sources point to two-by-four planks with holes drilled for strawberries, gravel dropped in for drainage, then soil on top.
Water follows gravity, and that is where these builds get complicated.
The top tier drains straight down into the one below it. The bottom tier can stay too wet, especially after rain, because it catches everything from above plus whatever the ground holds.
One way to play this: leave the bottom box to herbs that tolerate damp feet, or drill more exit holes low on the sides.
Another is to gap the tiers slightly so air moves between them and water does not sheet straight down.
A standing strawberry planter has a side benefit I had not considered until reading the build notes.
Its vertical shape routes water straight to buried roots without wetting leaves and stems, which cuts down on the leaf rot and mold that ruin so many patio harvests.
That same idea translates to ladder or cascade builds: angle the soil faces so water hits dirt first, not foliage.
Cost stays low because the frame is simple lumber. The drainage is the part that repays attention.
11. Wall-Mounted Planters
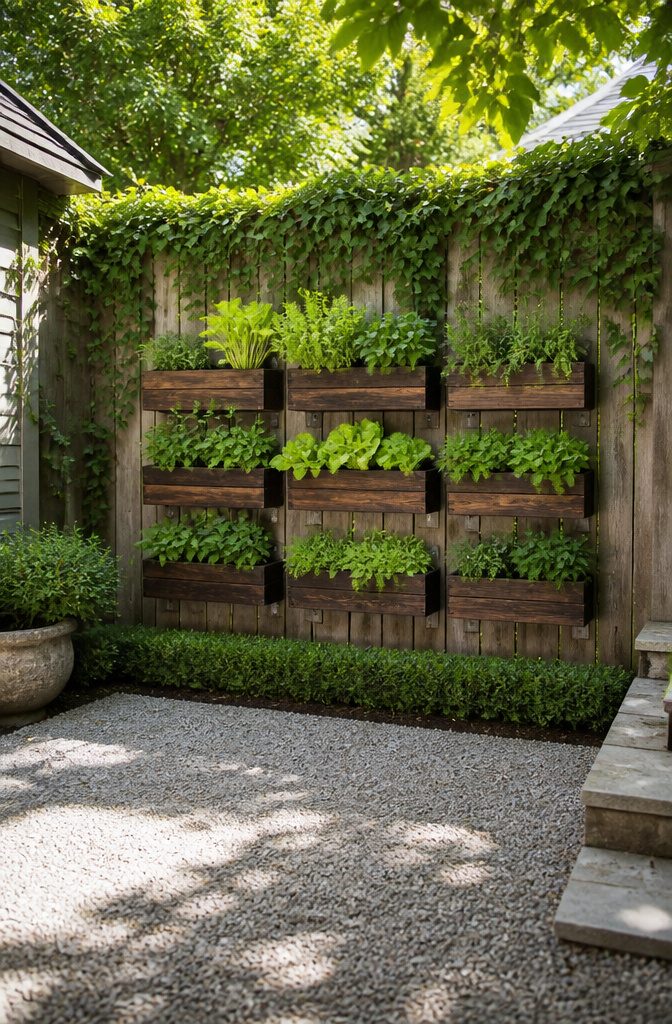
Vertical wall planters turn empty siding, railings, or balcony partitions into growing space without touching the ground at all. Pocket planters, gutter gardens, and simple mounted boxes all work for shallow-rooted crops like lettuce, basil, chives, and radishes.
Pocket planters are fabric pouches that hang in rows, each holding a small cluster of herbs or greens.
Gutter gardens repurpose metal or vinyl rain gutters into long, narrow channels mounted level on the wall. Mounted boxes built from cedar planks add shelving that climbs upward, and you can paint or stain them to match your house exterior.
The wall itself is the limiting factor. Check the weight your structure can handle before you load it with soil, water, and mature plants.
In summer heat, these containers dry out fast, so plan on watering more often than you would with in-ground beds or larger raised planters.
For renters with patios or balconies and no yard access, this is often the only raised bed option that does not violate a lease or require ground clearance.
12. Self-Watering Bed Build
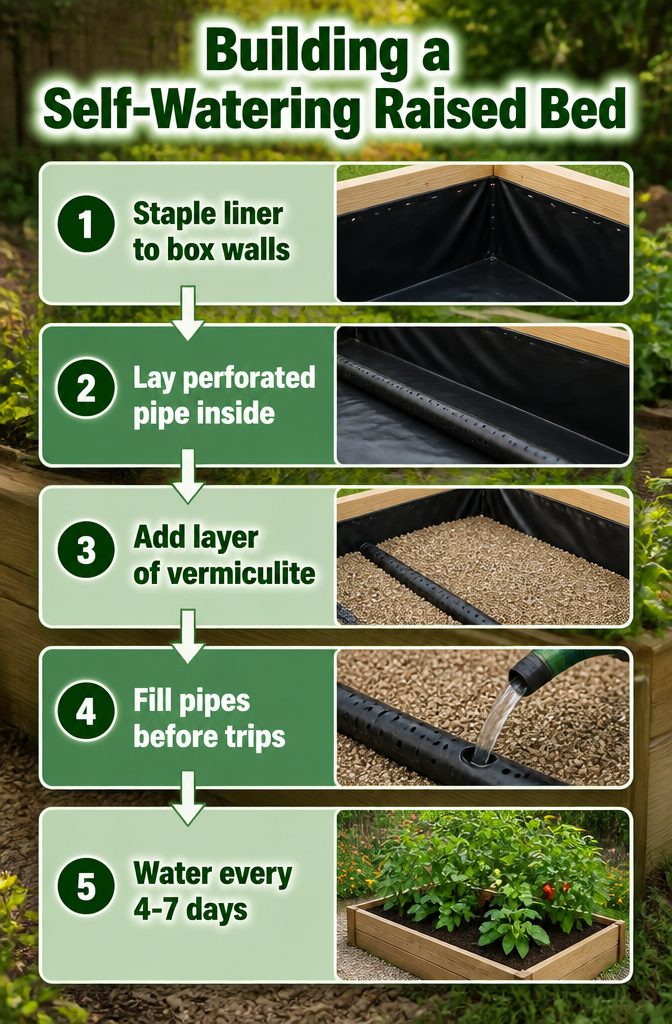
Perforated drain pipe and a fish pond liner turn a basic raised box into a reservoir system that buys you days between waterings.
I built one last spring after watching a neighbor’s tomatoes crisp up during a July heat wave while my peppers sat steady on half the hose time.
The work is front-loaded. You staple the liner to the box walls, lay the perforated pipe across the bottom, and cover it with a layer of vermiculite.
That vermiculite acts like a sponge suspended above the water line; roots draw from it when the surface soil dries. Filling those pipes before a week-long trip replaces the daily sprinkler ritual for anyone who steps away on summer weekends.
Upfront cost runs higher than dirt-in-a-box between the liner, the pipe, and the vermiculite.
The trade is frequency: instead of watering every evening, you top the reservoir every four to seven days depending on heat. In zones where August tops 90 degrees for stretches, that math pays back fast.
What Raised Beds Actually Do
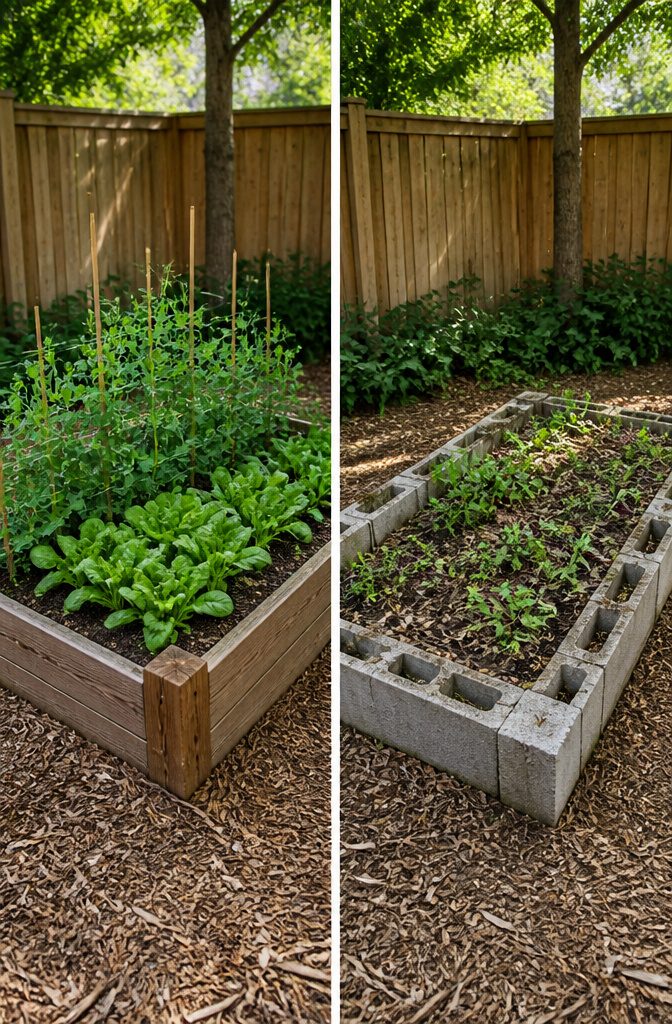
The first spring I used a raised bed, I noticed the soil was workable three weeks before my in-ground rows.
That faster warming let me set out peas and spinach while the rest of the garden was still too cold and muddy to touch.
The elevation does this: soil above ground level drains better and catches sun on all sides, so it dries out and heats up sooner.
Weed pressure dropped too. My beds sit with permanent wood-chip paths between them, so I am not tilling walking paths back into garden space every season.
What weeds do blow in pull out easily; the soil stays loose because I am never stepping in the growing area to compact it.
Access matters more than I expected.
Bending to ground level for planting and harvest was harder on my back than I admitted at thirty. Even a modest 10–12 inch wall lets me sit on the edge and work without kneeling.
Raised beds extend the season and cut the labor, but they do not replace good soil.
I still add compost each spring. The frame just makes it simpler to build and keep that layer where I want it.
Wood That Lasts and Wood That Does Not
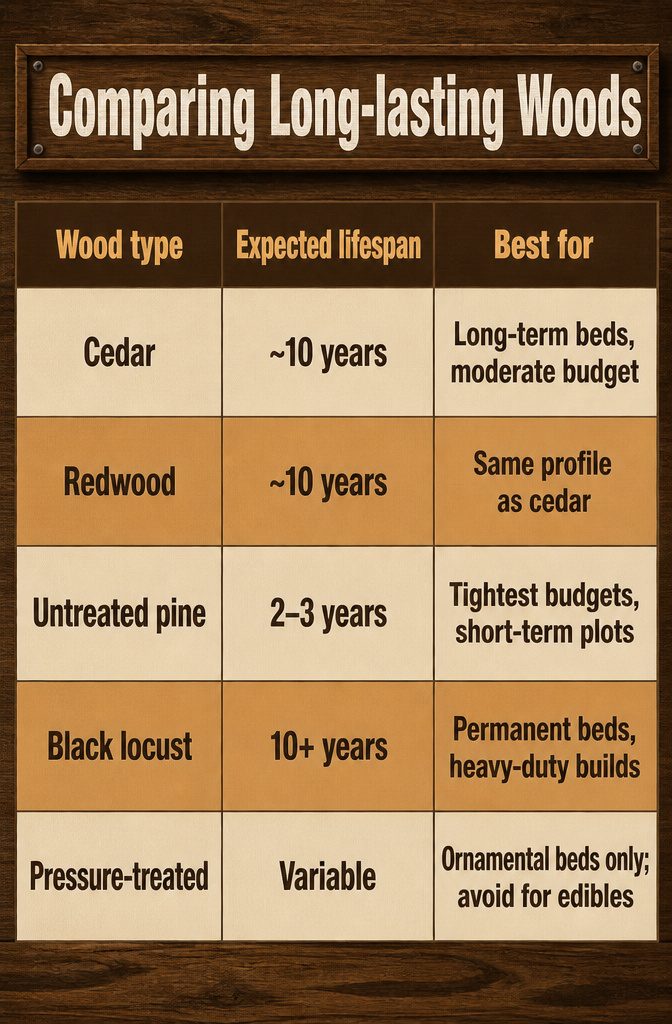
Pressure-treated lumber sits cheap and straight on every Home Depot rack, which makes it tempting, but I skip it for anything I will eat.
The EPA banned arsenic in treated wood back in 2003, yet the replacement chemicals still leach into soil in ways we do not fully understand. Arsenic was once considered safe too.
Cedar and redwood last about ten years with their natural rot resistance.
Untreated pine runs far less upfront but bows and rots in two to three years. Black locust, where you can find it, outlasts both but weighs enough that you may need help moving the boards.
A 4-by-8 bed in cedar might run triple the pine price, yet spread across a decade the annual cost drops below the price of a single replacement build. Pine looks like savings until you rebuild in year three.
| Wood type | Expected lifespan | Best for |
|---|---|---|
| Cedar | ~10 years | Long-term beds, moderate budget |
| Redwood | ~10 years | Same profile as cedar |
| Untreated pine | 2–3 years | Tightest budgets, short-term plots |
| Black locust | 10+ years | Permanent beds, heavy-duty builds |
| Pressure-treated | Variable | Ornamental beds only; avoid for edibles |
My own beds are cedar, put in four years ago and still square.
Sizing a Bed You Can Actually Reach
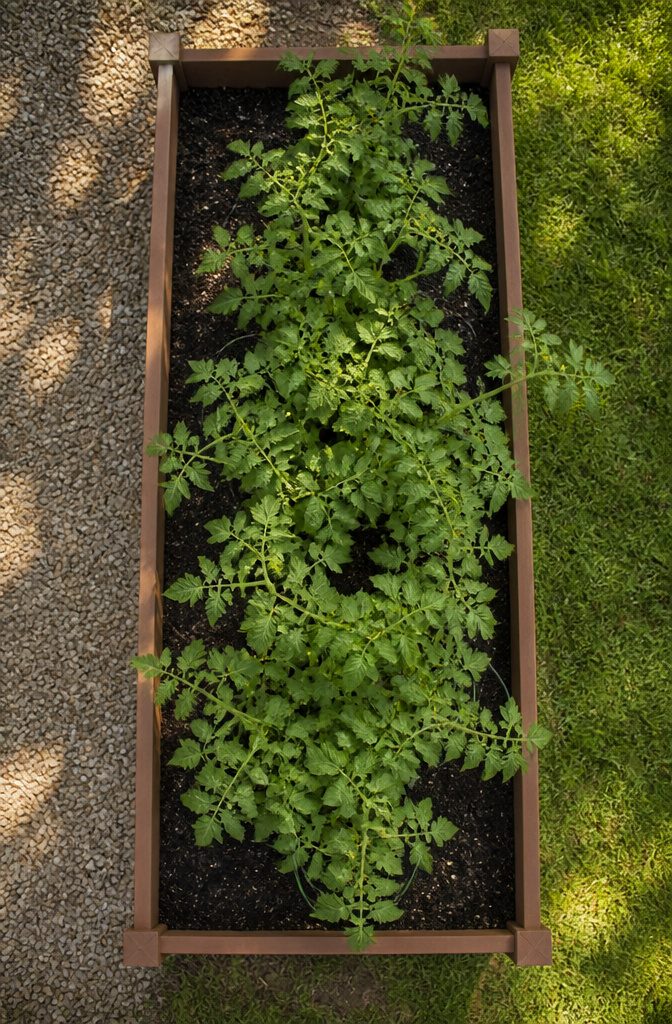
A bed you can reach across from either side without stepping in stays four feet wide at most.
That is the hard ceiling for most of us, and the number I ignored when I built my first one six feet across.
I figured more width meant more tomatoes. What it meant was compacted soil where I had to lean in, crushed seedlings where I stepped to weed, and a center strip that stayed dry because my hose never reached it properly.
Length is whatever your space allows. I have seen beds run four feet by twelve feet along a fence line and work fine, since the access is only from one side anyway.
Height depends on what you are growing: six inches covers lettuce and greens, twelve handles most vegetables, and root crops like carrots or potatoes in heavy or poor soil want two feet or more to develop straight and deep.
My six-foot-wide bed is now two separate four-foot beds with a path between. The tomato count went up, not down, because the plants in the middle actually survived.
Frequently Asked Questions
What is the cheapest way to make a raised bed?
Simply mounding soil into an eight-inch mound costs nothing beyond the amendments you work in. No frame to buy or build, and you can add a frame later once the soil is already productive.
The tradeoff is that rain flattens the sides over the season and you need to walk carefully to avoid compacting the edges.
What kind of wood can I use for a raised garden bed?
Cedar and redwood last about ten years with natural rot resistance, while untreated pine bows and rots in two to three years.
Pressure-treated lumber sits cheap on the rack, but the chemicals used in treating it can leach into soil you plan to eat from, so skip it for edibles.
Black locust outlasts everything if you can find it, though the boards weigh enough that you may need help moving them.
How deep do raised garden beds need to be?
An eight-inch depth is the minimum for poor native soil, while four to eight inches works if your ground is already decent.
Six inches covers lettuce and greens, twelve handles most vegetables, and root crops like carrots or potatoes in heavy soil want two feet or more to develop straight.
The article notes that mounded beds need at least eight inches if your native soil is lousy.